You were presented with a telescope? Or maybe you bought one for a child and you need to explain how to use it? Or you finally have the opportunity to buy a telescope for yourself and realize your long-held dream of observing celestial objects, but you’re not sure that you can manage it on your own? If you have answered “yes” to any of these questions, then the best thing for you to do is to meet experienced astronomers who can explain and show you how to operate a telescope. Unfortunately, though, such an opportunity is not always available. That’s why with this article we try to help those who don’t have astronomy experience yet – but are eager to start observing.
First of all, don’t be afraid! Astronomical observations are not easy, but, as the saying goes, it’s not a rocket science. Thousands of people all over the world have figured out how to observe with a telescope and enjoy magnificent views every clear night. To observe the night sky, you, as a novice user, will need a simple telescope for amateur astronomers – there’s no need for a very sophisticated professional instrument for this purpose. And believe us; you can easily manage such a telescope with just a little effort and interest on your part. Second, you will have to learn some new things and remember some old knowledge from your geography and astronomy classes. Let’s do it!
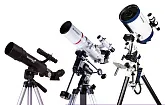
The most important step in buying an amateur astronomy telescope is gathering all necessary information on the topic. Spend some time reading astronomy articles and forums; consult astronomers you know, or sales clerks. The 'Good to know' section of our website also contains lots of useful information for astronomy beginners; don't forget to check it beforehand. Buying an amateur astronomy telescope for beginners won’t bankrupt you, unless you pick the most sophisticated model that you think is better because of the bigger price. Don’t do it, because to start working with such a complex instrument will be very difficult. Amateur telescopes designed especially for children and beginners are lightweight, easy to assemble and operate.
So, now you have a telescope. Don’t wait till dark to assemble it! On the contrary, you need to assemble it during the day somewhere that you feel comfortable, and not on the observational spot you see for the first time in your life. Assemble the telescope according to the user manual and try to memorize the actions you will have to perform in the dark of night in the future.
The main optical element of a telescope is its objective or a mirror, depending on the optical design. This element collects the light and forms an image of the observed object in the area called focal plane. Aperture, focal length and build quality of an objective or a mirror define the main specifications of your telescope. During observations the objective is aimed at the observed object (that’s why it’s called “objective”), and you observe through an eyepiece. Most amateur telescopes come with several interchangeable eyepieces with different focal lengths and that provide different resulting magnifications.
Choose an eyepiece with the longest focal length (i.e., one that provides the lowest magnification), install it and point the optical tube to some object outside your window. Likely the view you will see will be slightly (or heavily) blurred. Much like binoculars, a telescope needs to be focused on the desired object. For this purpose, the objective’s and eyepiece’s focal planes should be aligned using a special mechanism called a focuser. Try turning the focuser’s knob until the image becomes more or less clear. Note that a telescope won’t focus on objects that are too close, since it is designed to observe very distant objects. Also remember that you won’t be able to achieve perfect views through a window since the glass is usually too uneven. Focusing is very important during celestial observations. Be prepared to re-focus every time you change an eyepiece, and also during temperature changes and group observations – as all people have different eyesight. That’s why you need to learn to focus without taking your eyes from the eyepiece. Also try to learn changing eyepieces without moving the optical tube. The more you practice, the less time the process will take.
Besides optical elements hidden inside a tube, a telescope also includes some important supporting elements. One of those elements is a finder scope. Most often a finder scope is a small scope with a crosshair fixed parallel to the main tube. A finder scope has low magnification (usually not higher than 8x) and a much wider field of view as compared to a telescope. Usually pointing a telescope to the desired object goes like this: An observer finds (with the naked eye) a constellation or a notable group of stars located near the desired object using a star chart and points a telescope in that direction. Then, while looking through the finder scope, the observer moves the tube and aligns the crosshair with the object (if it’s visible) or a notable object near it. You should learn to keep your second eye open while looking through the finder scope, as that will allow you to correlate a part of the sky visible with a naked eye with a part seen through the finder. After pointing the telescope, an observer is usually able to see the desired object through an eyepiece.
The procedure looks pretty simple, but it necessarily requires the exact parallelism of the finder scope’s and optical tube’s axes. This is achieved during the finder scope aligning procedure done with adjustment screws located on the finder scope. Finder scope alignment should be performed before every observing session. Even if the telescope hasn’t been disassembled since the previous observation, you still need to check the alignment. Alignment is best done during the day. Install an eyepiece with small magnification (long focal length) and point the telescope tube on any notable significantly distant terrestrial object. Secure the position of the tube with the locking mechanisms of the mount. Then, looking through the finder scope, turn the adjustment screws to move the crosshair towards the selected object. It’s possible that while tightening some screws you will have to loosen the opposite screws. When the crosshair is aligned with the object, make sure that it is also seen through the eyepiece. Tighten all adjustment screws carefully so none of them stay loose; otherwise the alignment will be lost before you start the observation. Besides optical finder scopes there are also collimation finder scopes, which “project” a bright red dot on the sky. Regardless of the finder scope type, proper alignment of the finder scope is very important for successful observations.
A mount is also a very important part of a telescope. If the objective defines optical characteristics, the mount defines how convenient observations are. There are two main types of amateur astronomy mounts: alt-azimuth and equatorial. The first type is easier to use and more lightweight; the second type allows you to use equatorial coordinates to easily find and track celestial objects but is more elaborate and requires preliminary polar alignment. Learn how your mount works and try all the available mechanisms. Remember that you will have to operate the mount in darkness while looking through the eyepiece, so make your hands memorize where the locking knobs and slow motion controls are.
Let’s hope that the night of your first observation will be clear and warm (though experienced astronomers manage to observe even in a bad weather, but that would be too much for the first time). But don’t get upset if it’s not. A cloudy sky means that the famous amateur astronomy rule – “a new telescope spoils the weather” – is still working. But there will be plenty of clear nights in the future, and while you wait for them you can spend this time productively by discovering your instrument’s abilities and learning the theory of astronomical observations from books and articles. If you look at the night sky, you will see myriad stars. But besides the stars there are a lot of other big and small objects in the sky: the Milky Way, the Sun, the Moon, planets, comets, asteroids, and a great number of nebulae, galaxies and star clusters. All these objects are located at different distances from us. But even the closest of them are so far away that we perceive them as located on some distant imaginary sphere or dome. Basically, such perception was dominant for a long time and is still acceptable for some purposes. That’s why we call the sky a “celestial sphere” and use angular measures – degrees, arcminutes and arcseconds – to determine coordinates of objects and distances between them.
We won’t discuss celestial coordinates in this article, since that subject is covered in astronomy handbooks. But we need to mention that even for your first observation you need to know in which direction north, south, west and east are in your region. If you tried following the movements of celestial objects (if not, you can do it on any free evening) for a long time (at least two hours) with a naked eye, then you know that because of the Earth's rotation around its axis, the Sun, Moon and other celestial objects rise in the east and set in the west (and the other way around in the Southern Hemisphere). Besides this, the rotation of the Earth around the Sun leads to gradual changes in the evening sky during the year. At first the laws of visible motion of celestial objects seem to be too complicated; the number of celestial objects seems overwhelming. So you will find yourself asking “How do I find needed objects?” and “What’s this object I’m observing right now?” quite often. But if astronomy really entices you, nothing will stop you and with time you will find that this “celestial clock” works beautifully and coherently. Fortunately, these days we have a lot of amateur astronomy literature and even planetarium software (Stellarium, Cartes du Ciel, StarCalc, etc.), which is able to predict what the sky will look like at a given time in a given place. It allows you to significantly expedite preparation for your observation and simplify locating desired objects.
Let’s get back to your first observation. If the weather is good, you won’t be able to not notice the disk or the crescent of the Moon. It’s a great first target. But it’s also a very interesting object for repeat observations, because the view of the lunar surface depends on the Moon’s phase. Let’s point the telescope at the Moon. Adjust the height of the tripod legs so the eyepiece is easily accessible for you at any position of the tube. If you have an equatorial mount, tilt its polar axis (refer to the user guide) at the angle approximate to the latitude of your location and set the mount so that the upper end of its polar axis “faces” north or a Polar star if you can find it. Install the longest focal length eyepiece and check the finder scope alignment by pointing the telescope at any terrestrial object and making sure that it’s in the crosshair. Now point the telescope in the direction of the Moon and look through the finder scope. Likely the Moon will not appear in the center of the field of view. Move the tube (with your hands or by using controls on the mount) so the crosshair is on the Moon. Now look in the eyepiece...
Most likely, the bright, detailed image of the magnified lunar surface will overwhelm you with emotions for quite some time. Take your time and enjoy your observations – this is what all of this is for. Congratulations with your “first light”! First observations with a new telescope are jokingly called “first light” in amateur astronomy. Don’t forget to check the focusing – maybe the image will become even clearer. Note that when focusing an image (especially at high magnifications), you will have to deal with some image shaking. That's a typical phenomenon in almost all instruments whether they are amateur telescopes or professional ones. To eliminate the vibration, try turning the focusing knobs very carefully with small steps and pauses. At some point you will notice that you have skipped the point of the best focus and need to go back. Sometimes it feels like even with the best focus the image is not sharp enough–but that is how optics work at high magnifications. Every telescope has its highest practical power; when it's being exceeded you won't get any more details, only diminished image quality. Besides that, atmospheric conditions, rising heat flows, increasing cloudiness and other factors can also get in the way of getting the highest image quality possible at a given time.
Now try installing the eyepiece with higher magnification and focus again. This is a typical routine for observing most objects – first a general view with low magnification, then a more detailed observation under higher magnification.
You have also probably noticed that under high magnifications the image quickly drifts in the field of view. This is not because the optical tube is moving somewhere; the real reason is the Earth's rotation. Usually unnoticed in your everyday life, this rotation will make you correct the position of the tube to keep the object in the field of view when observing under high magnifications. It can be done by hand, or by using slow motion controls or a motor drive on the mount. A motor drive is a very convenient device as it compensates for the rotation and doesn't create additional vibrations.
If on the evening of your first observation the Moon is not visible in the sky, do not despair. You can always try observing some bright planets (Venus, Jupiter) or a star group. The process of pointing a telescope is just the same as described above. By the way, if the Moon looks quite big and generally magnificent through any telescope, the views of other objects (such as planets, some nebulae and clusters) may disappoint the observer at first. The telescope produces images according to its capabilities; you were just expecting to see something as vivid, bright and large as those pictures from professional observatories or amazing space views you see in astronomy magazines and on the Internet. Don't be surprised – small amateur telescopes can never compete with the Hubble Space Telescope when it comes to image quality. But surely they can give you valuable astronomy experience – the more you observe the more details you will notice, even on familiar objects. Besides, an amateur telescope provides you with a sense of belonging to the mystery of space, which no picture from the Internet can give you. Remember that each of your observations is special as it represents the state of the selected celestial object at this exact moment in time. You will gain more and more experience with observations and processing the results of your observations and maybe one day you will discover a new comet or supernova explosion.
We hope that you enjoyed your first observation. But don't stop there, because a great number of interesting celestial objects are waiting for you to discover them! You have a long but enthralling journey ahead of you. And we have a perfect guide for you in this journey – Alexander Shimbalev's “See it all!” Astronomer's Handbook. The book is an illustrated guide created for beginning astronomers, which will tell you about the most interesting celestial objects and when and where it's best to observe them.
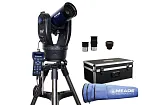
With such a helpful book, you will learn how to find your way in the sky very quickly, to locate desired celestial objects and use your telescope's capabilities to the fullest. The book comes as a part of the extensive kit of beginner telescopes in the Levenhuk Strike series, but may also be purchased separately.
We wish you the best observations, clearest skies and constant improvement of your observational skills!
Any reproduction of the material for public publication in any information medium and in any format is prohibited. You can refer to this article with active link to levenhukb2b.com. The manufacturer reserves the right to make changes to the pricing, product range and specifications or discontinue products without prior notice.

 BG
BG  CZ
CZ  ES
ES  HU
HU  IT
IT  PL
PL  TR
TR